nodejs项目技术小结
文章目录
最近在很紧张地使用typescript开发一个项目。和正常的业务项目很类似,前期的设计及技术框架搭建还有些意思,目前在做的业务功能开发就比较按部就班,今天终于有时间,先将前期技术框架搭建过程中的一些技术点记录下来。
这个项目是一个正常的前后端单体应用,在项目启动之初,考虑到团队内部人员的技术积累,最终选择以typescript为前后端主要开发语言。
前端项目初始化
前端选用VueJS及与之配套的一组成熟的库,使用vue-cli创建项目:
$ npm install -g @vue/cli
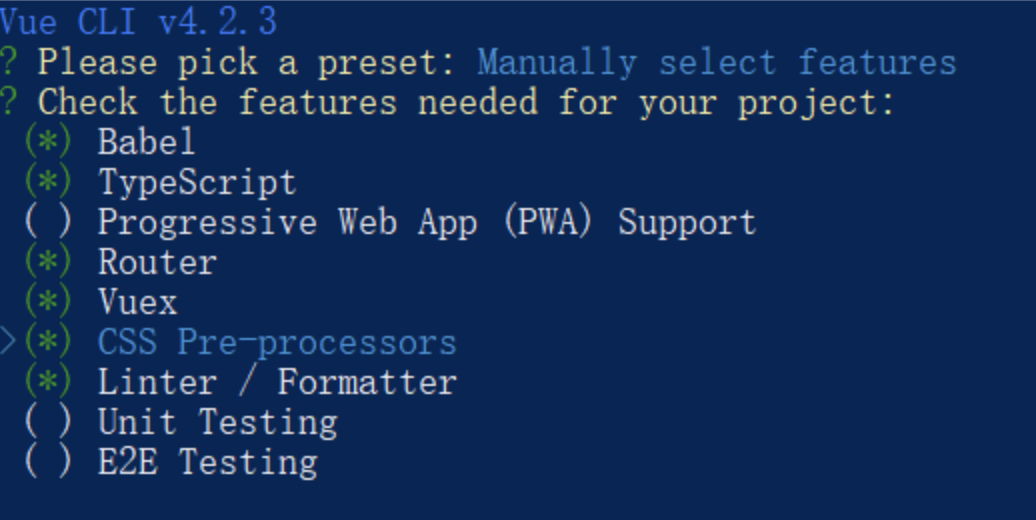
$ vue create xx_frontend
这里选择Manually select features,选择Babel、TypeScript、Router、Vuex、CSS Pre-processors、Linter/Formatter这些特征。
后端项目初始化
后端我以一个starter骨架项目为基础,在此基础上开发业务API接口:
$ git clone git@github.com:ddimaria/koa-typescript-starter.git
$ cd koa-typescript-starter
$ git checkout -b upgrade-to-typescript-3 origin/upgrade-to-typescript-3
$ yarn install
$ yarn run watch
前后端接口协议约定
这个项目里前后端使用swagger.json描述交互的API接口,事实上koa-typescript-starter里本身已经集成了swagger的功能。但经过调研,发现让业务开发同学直接编写swagger.json难度较大。于是找了种自动生成swagger.json文档的方案koa-swagger-decorator,我对这个库进行了一些增强。
$ npm install --registry=https://npm.pkg.github.com @jeremyxu2010/koa-swagger-decorator@1.6.1 --save
然后就参考https://github.com/jeremyxu2010/koa-swagger-decorator/blob/master/example/routes/index.js简单配置下SwaggerRouter,在Controller里通过decorator描述每个API接口入参及响应schema就可以了。
import {
  request,
  summary,
  body,
  tags,
  middlewares,
  path,
  description,
  producesAll,
  responses
} from '@jeremyxu2010/koa-swagger-decorator';

const tag = tags(['User']);

const logTime = () => async (ctx, next) => {
  console.log(`start: ${new Date()}`);
  await next();
  console.log(`end: ${new Date()}`);
};

const userSchema = {
  name: { type: 'string', required: true, default: 'jeremyxu' },
  password: { type: 'string', required: true, default: '123456' }
};

const userRespSchema = {
  type: 'object',
  properties: {
    name: { type: 'string', required: true }
  },
  example: {
    name: 'jeremyxu'
  }
};

@producesAll(['application/json'])
export default class UserRouter {

  @request('POST', '/user/register')
  @summary('register user')
  @description('example of api')
  @tag
  @middlewares([logTime()])
  @body(userSchema)
  @responses({
    200: { description: 'file upload success', schema: userRespSchema}
  })
  static async register(ctx) {
    const { name } = ctx.validatedBody;
    const user = { name };
    ctx.body = { user };
  }

  // ..... other API
}
后端项目运行起来即可通过http://127.0.0.1:3000/swagger-html访问到接口文档。
前端同学根据swagger文档快速构建一个可用的mock服务也很方便:
# 转化swagger.json为openapi.yaml
$ curl -o swagger.json http://127.0.0.1:3000/swagger-json
$ npm install -g swagger2openapi && swagger2openapi -p -w -y -o openapi.yaml swagger.json

# 根据openapi.yaml自动启动一个mock server
$ wget https://github.com/danielgtaylor/apisprout/releases/download/v1.3.0/apisprout-v1.3.0-mac.tar.xz
$ tar -Jxf apisprout-v1.3.0-mac.tar.xz
$ ./apisprout -p 4000 ./openapi.yaml
生产环境部署
虽然通过npm run start可以将服务跑起来,但生产环境还需要利用服务器的多核性能,可以利用pm2来自动完成这点:
$ npm install -g pm2
$ pm2 start ./dist/index.js --name xx_backend --instances 4
The End!
参考
文章作者 Jeremy Xu
上次更新 2020-08-16
许可协议 © Copyright 2020 Jeremy Xu